
Welcome back to everyone in the PowerGuide Mentorship Program.
Today, I am gonna share a Tip - PowerGuideTip5 to improve Canvas App performance by using the Collect function.
Microsoft is already working hard to improve the performance of all apps that run on the Power Apps platform. But today, I am going to share one Tip that boosts the performance of apps that you create.
Let's get started...
What is Collect Function?
- Collect is a kind of variable that is capable to store Collection of records/data in it.
- Collect are sometimes used to hold global variables or make a temporary copy of a data source.
- Collect can be used to store A Single Value, A Record and A Table.
- Collect store the A Single Value, A Record and A Table in Canvas App local storage/cache.
When should I use Collect Function in my Canvas App?
There might be multiple scenarios where Collect Function might be helpful to use:While Retrieving the Data from Data Source: Collect Function used to hold the temporary copy of your data source. By doing this, you can limit making the connection with the data source and also limit the number of queries you perform to retrieve the data from the data source.
This helps you to improve the Canvas App Performance.
While Pushing the Data to Data Source: Using Collect you can collect the data/record locally in your canvas app and then Push it into an actual database in one go, rather pushing it every time when you perform any operation from the Canvas App.
Can I clear the Collection after being created?
Collect values can also be cleared/removed depends upon the need. There are following ways to do that:Clear - Clear function deletes all the records of a collection. The columns of the collection will remain as is.
Remove - Remove function is used to selectively remove the record from the Collections
RemoveIf- RemoveIf function to remove a record or records based on a condition or a set of conditions.
ClearCollect- ClearCollect function is the combination of Clear and Collect. It first Clears the Collection's data/records and then adds a new set of records to the same Collection
How can I read or retrieve all the Collection records?
ForAll - ForAll function used to read all the records available in a particular Table.What is the Syntax of all these above functions?
Collect ( DataSource, Item, ... )DataSource – Required. The data source that you want to add data to. If it does not already exist, a new collection is created.
Item(s) - Required. One or more records or tables to add to the data source.
Clear ( Collection )
Collection – Required. The collection that you want to clear.
Remove ( DataSource, Record1 [, Record2, ... ] [, All ] )
DataSource – Required. The data source that contains the record or records that you want to remove.
Record(s) – Required. The record or records to remove.
All – Optional. In a collection, the same record may appear more than once. You can add the All argument to remove all copies of the record.
RemoveIf ( DataSource, Condition [, ... ] )
DataSource – Required. The data source that contains the record or records that you want to remove.
Condition(s) – Required. A formula that evaluates to true for the record or records to remove. You can use column names from the DataSource in the formula. If you specify multiple conditions, all must evaluate to true for the record or records to be removed.
ClearCollect ( Collection, Item, ... )
Collection – Required. The collection that you want to clear and then add data to.
Item(s) - Required. One or more records or tables to add to the data source.
ForAll (Table, Formula)
Table - Required. Table to be acted upon.
Formula - Required. The formula to evaluate for all records of the Table.
Do we have some real-time examples to understand these all functions?
There are various real-time examples where we can use these functions.Let me explain by taking an example of Field Service Agent, who uses a Mobile App (Canvas App) to handle his all sales/service activities and often visit at Customer Location based on his scheduled appointment.
During the customer visit, he might need to capture a lot of things while interacting with the customer.
Like:
- Capture Notes/Discussions
- Audio Recording of Meeting
- Create multiple To-Do Tasks/Action Items
- Assign the Task to the respective Sales Team in order to follow-up with the customer.
- Click various Images/screenshots through Camera
- Attach some supporting documents
- Capture Customer Signatures and many more...
So while being in the meeting with the customer, a Field Service Agent has to do all these above activities.
Now, Just think about it, In order to perform these activities, every time I have to Push the data in the data source (Lets Suppose in our case it is Dynamics 365), then obviously it will impact the App performance. Because every time while performing the operation in Data Source (Dynamics 365), your app needs to make the Connection with D365, Perform the desired operations in D365 and return the result to the mobile app in order to display the actual result.
This is surely not the best solution from the architecture and user experience perspective.
In this type of requirement, the Collect function comes into the picture, where we can perform all these activities locally in your app and can hold the data/record in a temporary database. Once done with your work/appointment, you can push everything in the actual data source in one go.
Let's Implement this Canvas App and Learn how to each of these functions work in Real-Time:
Example of Collect:
Step 1: Create a Blank Canvas App with Blank Screen (ignore if you already have) > Connect it with Dynamics 365 Data Source > Connect with Task Entity

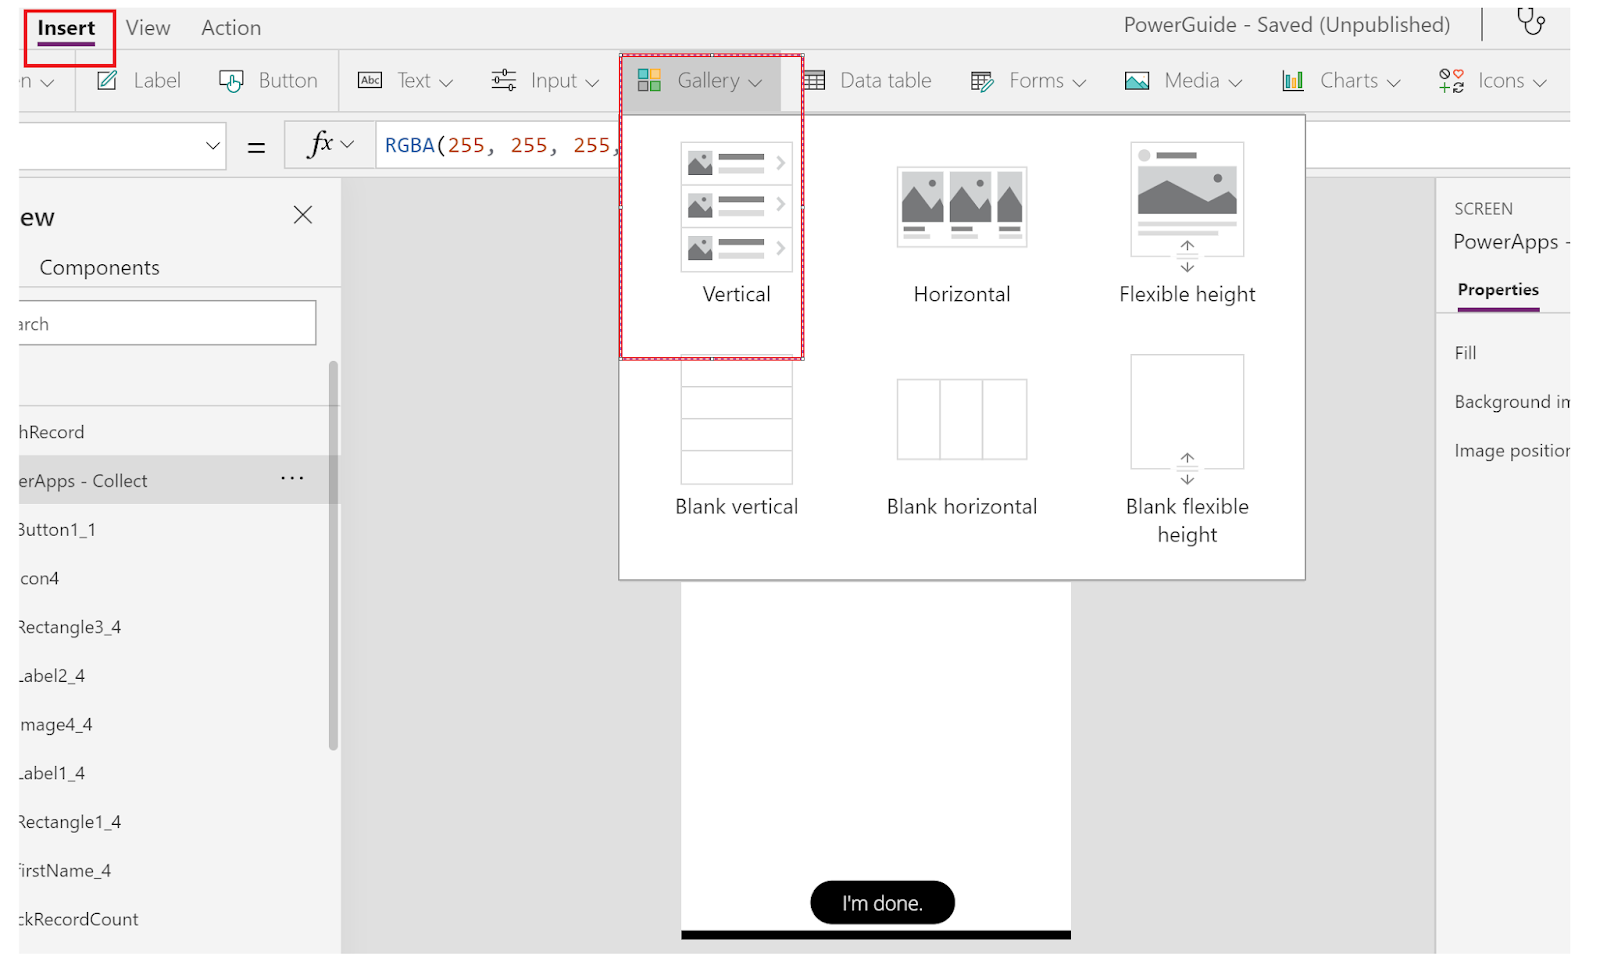
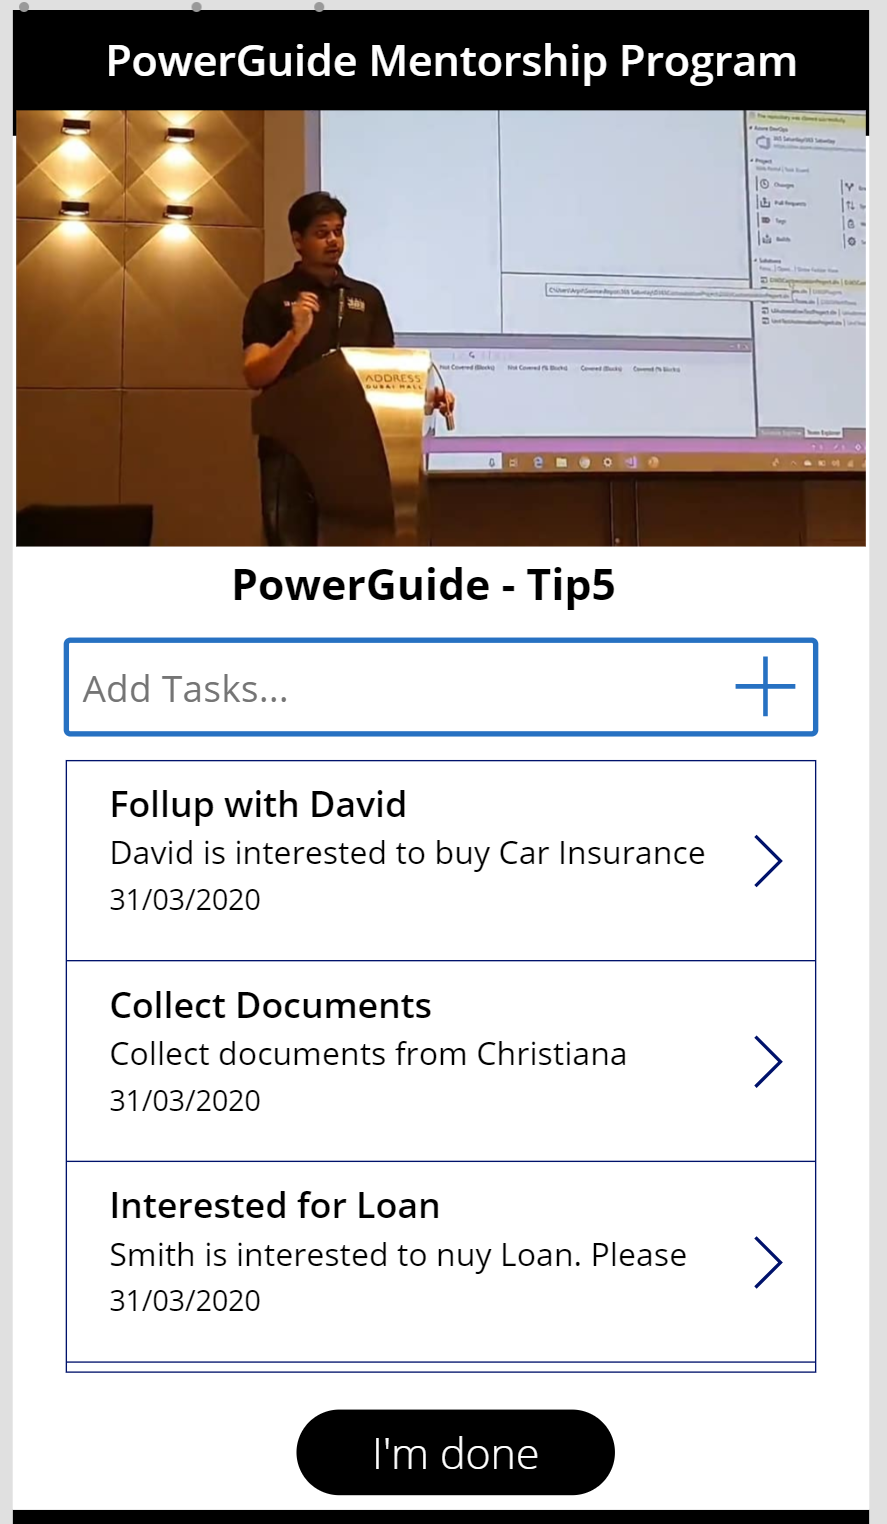
Step 2: Design the Screen1 by adding few controls as shown below (or design as per your requirement). Also add Vertical List Gallery to display Created Task's List.


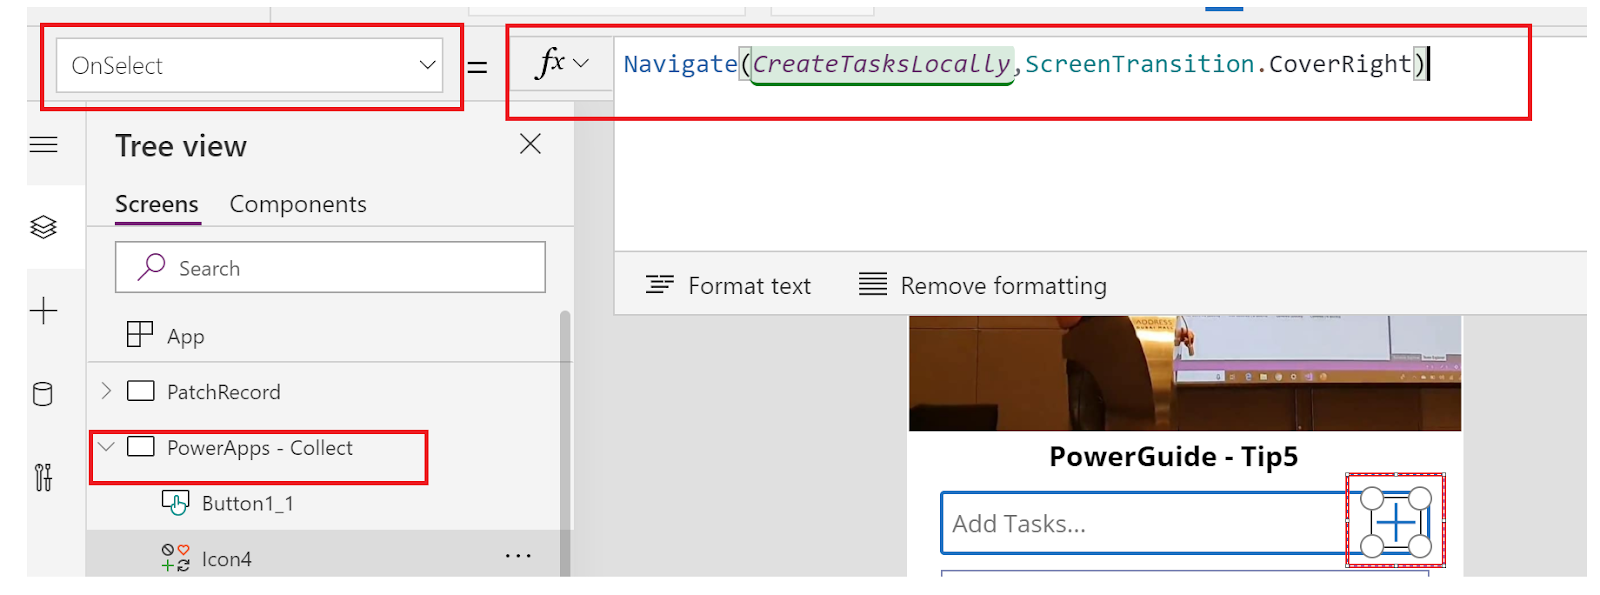
Step 3: Add one more Screen2 in order to Create Task.

Step 4: Add Collect Function on onSelect property of Create button


Step 5: Set the Collection as a Data Source to Task Gallery in Screen 1

Step 6: Run the App and See the Output


Example of ClearCollect:
Step 1 to 3 will remain the same.
Step 4: Add ClearCollect Function on onSelect property of Create button

Step 5: Run the App and See the Output


Example of Removeif:
Step 1: Add Delete Icon in Your Task List Gallery

Step 2: Add RemoveIf function (as below) in order to delete the record base on the condition given.

Step 3: Run the App and See the Output

Example of Remove:
Step 1: Add Delete Icon in Your Task List Gallery
Step 2: Add Remove function (as below) in order to delete the selected record

Step 3: Run the App and See the Output

Example of ForAll:
Step 1: Add ForAll function to read Collection (as below) in order to Patch all the records in Dynamics 365

Step 2: Run the App and See the Output


Where can I see my Collection in PowerApps?
Here is the way to see your all Collections in Tabular Format
What are the other options in Canvas Apps in order to get the refreshed/updated data from the actual data source?
In Canvas App, once you create the data in the data source (D365), you have four possible options in order to get the updated data from the database.- Go to View > Data Sources > Right Click on the Entity/Table > Hit Refresh

- Manually Refresh by adding Refresh(<Entity Name>); function on either click of some custom button/icon.

Automatically Refresh the data by adding Refresh(<Entity Name>); function on onVisible property of your Canvas App Screen

What is the validity of the data being stored in the PowerApps Collection?
Data will be available in your PowerApps Collection unless you close the App. If you don't want to loose the data and want to use it further when you open your app again....we have some more interesting features that help PowerApps to work in Offline mode as well. I'll share it in my next post.
I hope you liked this Tip and will use in our implementation to improve your App performance.
In my next Tip- PowerGuideTip6, I will share one more interesting feature related to the Collect function through which you can work with PowerApp in Offline mode as well,
Cheers and Stay Tuned 👍


